Table of Contents
Two-factor authentication (2FA) adds an extra layer of security to your account by requiring a verification code in addition to your password when signing in. This helps protect your account even if your password is compromised.
Step 1: Open 2FA Settings #
- Log in to your Fantasy Engine account.
- Click your View Profile in the top-right corner.

- Click Edit Profile.
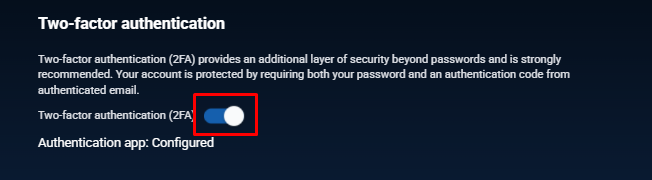
- From the left menu, click Two-factor authentication.

Step 2: Turn On 2FA #
- Locate the Two-factor authentication (2FA) toggle.
- Switch the toggle ON.
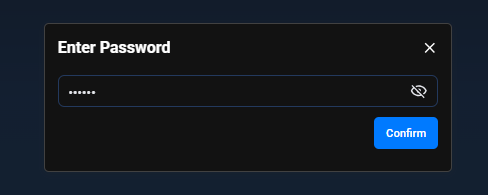
- A security dialog will appear asking you to enter your current password.
- Enter your password and click Confirm.
Step 3: Choose an Authentication Method #

After confirming your password, choose one of the following 2FA methods:
Option 1: Authentication App (Recommended) #
- Use apps such as Google Authenticator, Microsoft Authenticator, Authy, or 1Password.
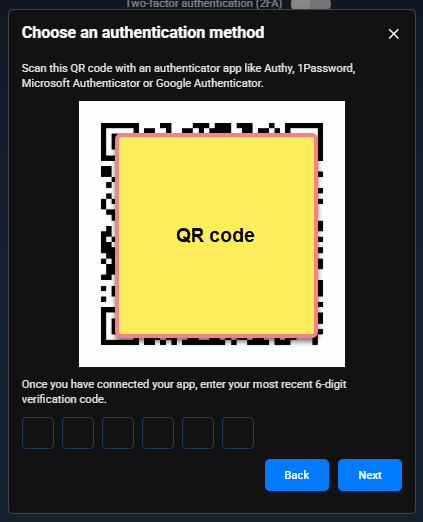
- Select Authentication App and click Next.
- A QR code will be displayed.
- Scan the QR code using your authenticator app.
- Enter the 6-digit verification code generated by the app.
- Click Next to complete setup.
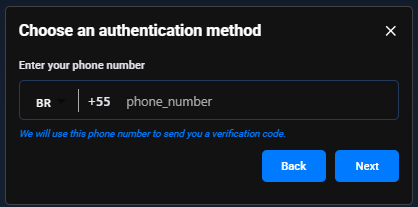
Option 2: SMS Verification #
- Select SMS.
- Choose your country code and enter your phone number.
- Click Next.
- Enter the verification code sent to your phone via SMS.
- Confirm to enable 2FA.
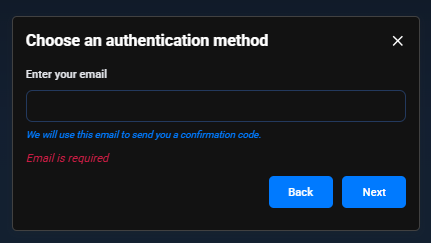
Option 3: Email Verification #
- Select Mail.
- Confirm or enter your email address.
- Click Next.
- Enter the verification code sent to your email.
- Confirm to enable 2FA.
Step 4: Confirmation #
Once completed:
- Two-factor authentication will be successfully enabled.
- You will be required to enter a verification code every time you log in, in addition to your password.
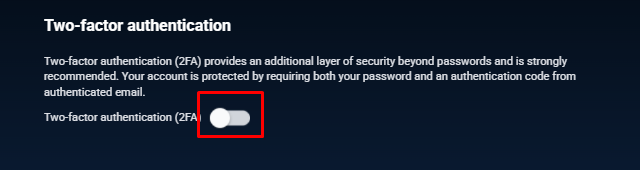
Turning Off 2FA #
- Go to View Profile → Edit profile → Two-factor authentication.
- Toggle 2FA OFF.
- Enter your password to confirm.
- 2FA will be disabled.